Translate

Sunday, July 25, 2021


 Hi All:

Been awhile since my last post, but moving house (downsizing to a Mobile home) has taken a lot of time and crafting supplies are still not all unpacked.

But wait, why unpack?  We have been in the new place since June 29th and have already found one we like better and will move again Sept 30th.   Moving, it seems, is in my blood...............lololol.

Did my pre-order from the new Mini Catalogue so have some supplies to work with and decided to take part in my first challenge with The Paper Players.   Hope I manage to post it to their blog correctly. https://thepaperplayers.blogspot.com/

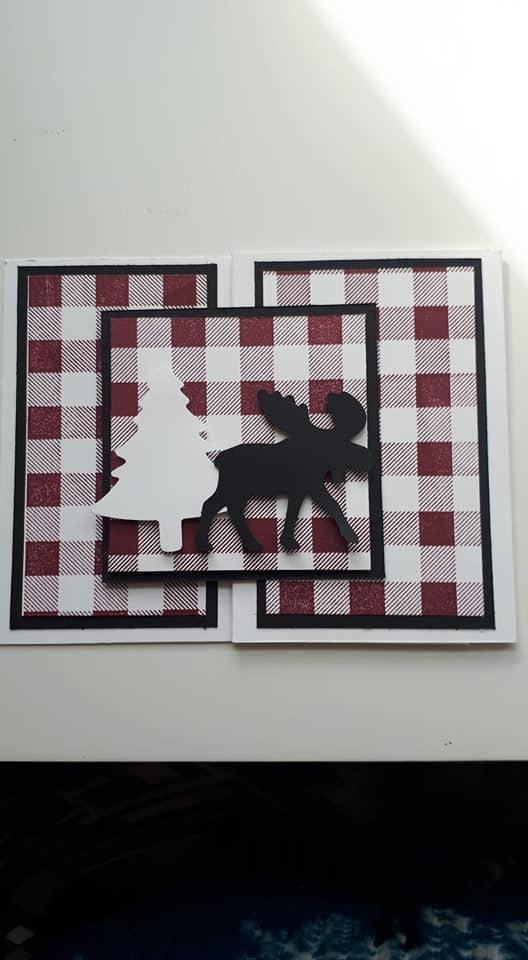
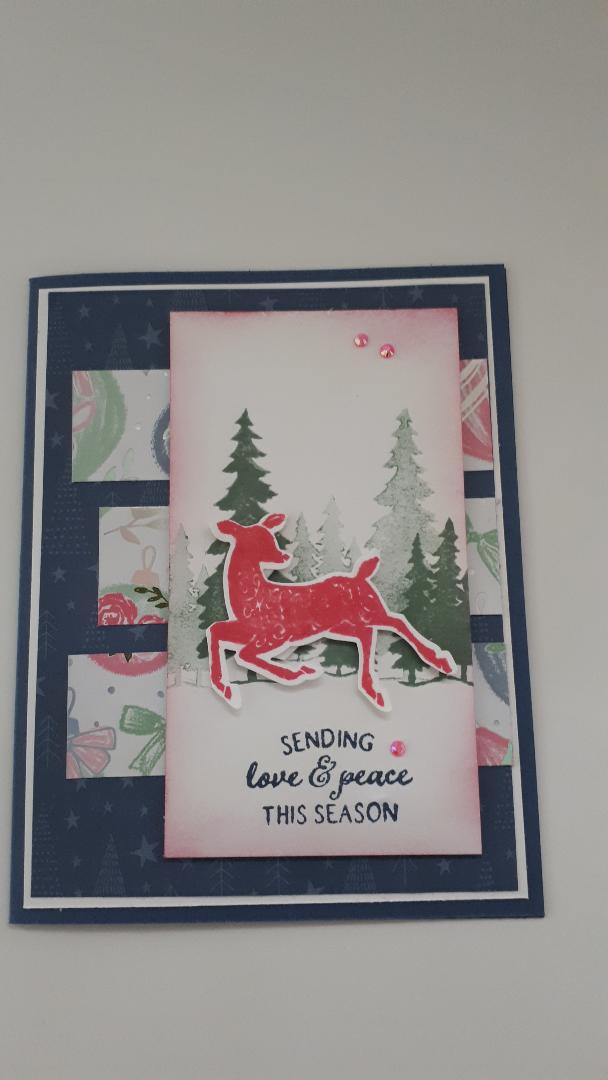
Designed this non traditional Christmas Card for a Sketch Challenge.  New products from the Stampin Up Mini Catalogue.

Colours:  Misty Moonlight

               Soft Succulent

               Polished Pink

                Whimsy & Wonder DSP

                Peaceful Deer Stampset.


Stay safe all, and it is never to early to start your Christmas Cards.


Sharon

Monday, June 1, 2020

Good Morning!!!

It has been awhile since I have posted to my blog and things need to change.  Have made a decision that the only way to feel comfortable blogging is to just do it.  What better day to start than June 1st.  Today's card is my first attempt at a Book Easel Card and I want to thank Tina Zinck https://www.youtube.com/watch?v=9wTbN-5cfxs&t=417s for the inspiration.  I can see many more of this type of card in the future.  Tina's card does not require a die, which I don't have anyway.  You could easily make the edges of the book pages a little fancier with an edge die, but being a avid reader straight is how books are supposed to be anyway, in my opinion...... :)


 "Open Book Easel Card" Measurements:
  • Basic Grey Card Stock: 8 ½” x 5 ½” (fold in half to create a 5 ½” x 4 ¼” card base)
Panels (for flap and inside layer):
  • Designer Series Paper: 5 1/8” x 1 7/8” (two pieces)
Easel Strip:
  • Basic Grey: 5 1/8” x 7/8”
  • Designer Series Paper: 4 7/8” x 5/8”
Large Book Page Layer:
  • Very Vanilla Card Stock: 5 1/8” x 3 7/8”
  • Designer Series Paper: 4 7/8” x 3 5/8”
Smaller Book Page Layer:
  • Very Vanilla Card Stock: 4 5/8” x 3 3/8”
  • Designer Series Paper: 4 3/8” x 3 1/8

I made an error making mine, which I corrected later.  When you attach your "book" to your base make sure the 2 1/8" piece is folded away from you before attaching.  The second picture is correct (well minus the cat who would not get out of the shot) and you can see how much higher it stands up.  The other way, it does not fold correctly to fit in an envelope.
I hope you have as much fun as I did making this one.     Oh, the cat's name is Tinker.


Friday, January 10, 2020

January 10, 2020

Completing some designs for my January Card Class.  This mini pizza box is perfect for 5 foil wrapped chocolate hearts or even a few 3x3 gift cards.

Stamp set used was Painted Poppies stamped with Poppy Parade using the large poppy image and background image.  The second layer have a few petals cut and curved to add dimension.  Add a couple leaves in Pear Pizzaz and a cute sentiment. Background DSP is from the Peaceful Poppies pack.  I also used the splotch pattern the Painted Poppies Stamp set on the sides and back of the box (sorry, no picture).

I took a break from designing after Christmas and after all the prep required for Christmas Craft Sales but am very happy to be back at my desk designing again.

Class is Jan 27th and eye surgery is the day after so happy to be all prepared for class ahead of time.

Sharon

Tuesday, October 22, 2019


Playing with the First Skate Stamp Bundle (stamp and dies) today.  This is a set I wasn't sure I really liked so challenged myself to make a card with it.  Had not done anything in Black and White for Christmas yet.  This is what I came up with.  Needs a bit of tweaking I think.  The first card needs a layer of red behind the black.  Hard to see but on both cards the black layer is embossed.  I personally like the first one best.  The background die cut on that one is from Frosted Foliage.  Pretty simple to follow but if you want measurements just let me know.

Wednesday, October 9, 2019

October 9, 2019

Busy designing cards for the upcoming Stamp a Stack.  This is the prototype for the first one.  Don't look too closely as I was merely getting measurements and colours down and there is a teeny mistake I hope no one notices..................lol.

Had to take a break for a couple days to undergo Cataract Surgery in my right eye, but finished now and well on the way to getting better vision and therefore more accurate cutting and measuring.....I hope!!

Loving the new DSP in the Holiday Catalogue and really anxious to share it with everyone at the Stamp a Stack.  Thanks so much to Melody Radovanovics a fellow Stampin Up Demonstrator who is co-hosting this years with me. 

Hoping everyone will enjoy our planning, our designs, our prizes and surprises.

Then once the Stamp a Stack is done it is on to prep of swaps for On Stage in Toronto as well as prep for a Christmas Market coming up November 24th.  No rest for the wicked they say.

Better go put yet another set of drops in my eye.............have a great evening.

Saturday, September 21, 2019

You may notice a change of blog name.  A successful paper craft artist recently told me that what we do is Art.  She thought that the name Craft-ings Creations, while catchy devalued my work. So after some thought and a suggestion from my daughter, as well as feedback from friends, I have decided to make a change.  Art-ings Creations more closely describes what I do and as a bonus pays tribute to my Dad (Arthur Edward Ings).  She also said we should all call our craft rooms - Studios as that is what they are, a studio where we create art.

Sunday, September 8, 2019

Spetember 8, 2019  Working on some Gift Card Holders for a craft sale in Rural Verner, Ontario.  The International Plowing Match is being held there in September and my daughter and I are setting up a table close to the area.

Simple gift card holder using Cardstock Base 11" x 4 1/4" Scored at 2 1/2 and 5 1/2"

Fold over on 2 1/2" score line to inside.  This becomes the gift card pocket.  Be sure to only glue at outside edges to leave open for gift card.

Decorate panels as you desire and add a 3" x  3" front piece glued only on one side so gift card flap can tuck underneath.  You can have your card open sideways or from the top down.

Sure wish I could figure out how to do videos as it would make it so much easier to explain.  If you need further details contact me at facebook: Craft-Ings Creations or email  peppercorn_ca@yahoo.com.


 Hi All: Been awhile since my last post, but moving house (downsizing to a Mobile home) has taken a lot of time and crafting supplies are st...